Spline-Based Workflow (continued)
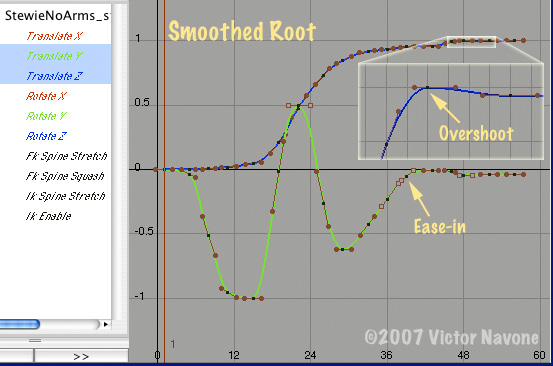
Smoothing the Root: Looking at the translation splines for the hips there are some obvious places that need smoothing, such as the big Y Translation arc of the jump. I can also add more eases and push the existing eases a little further. Near the end of the animation where he stands up I neglected to add an ease-in breakdown. Not to worry; I can add this ease directly in the spline editor. In the animation below notice how much the arcs and spacing in the hips have improved. I also added a slight overshoot to the Translate Z spline on frame 48 to make the hips overshoot forward when he looks back. Roll-over the image below to see "before" and "after".
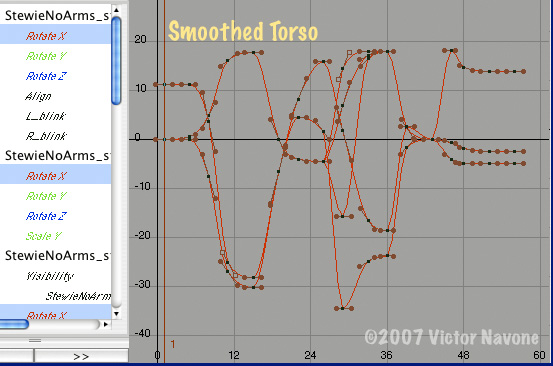
Smoothing the Rest: Once I'm happy with the hips I move up through the torso and head and apply the same techniques. Here are the Rotate X splines for the spine and head after a basic smoothing pass. I tend to treat the joints of the spine as one object when I pose and smooth it (roll-over the image below to see "before" and "after"):
Then on to the legs and arms (if he has them). It's important to finish smoothing the root first because it affects all the animation in the rest of the body. Here is what I would call my "rough" or "in progress" animation.
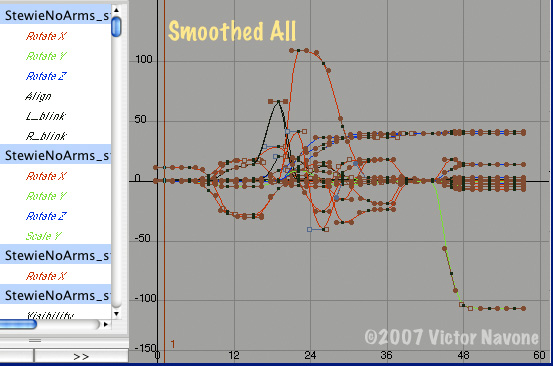
There is still plenty to do: the left leg looks floaty; there is no lead and follow between the head and body, and the knees need to be polished. Yet without adding or offsetting a single key I was able to transition from blocking to smooth animation without compromising my basic timing and paths of action. The animation is also still very organized because all the keys fall on the same frames, and every control is keyed. This makes revisions easier. From here I can add or delete keys as I see fit, and move them backward or forward in time.
So that's it. That's all I really feel about telling your right now.
Splines.
Love them.
Now go animate something.