Tips and Tricks
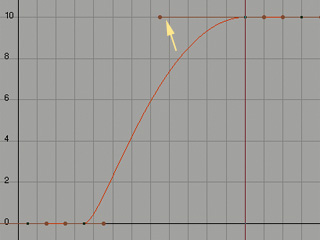
Easy Eases - Not every action requires 3 or 4 keys to describe. Sometimes you can get away with just pulling tangent handles. For example, for small movements such as finger bends, you could create and ease-in just by lengthening the tangent handle leading into the B pose. Often I will do this to multiple splines at the same time to speed up my workflow. As you gain experience with animation and splines you will learn where you can take shortcuts like this and where you need to add more attention.
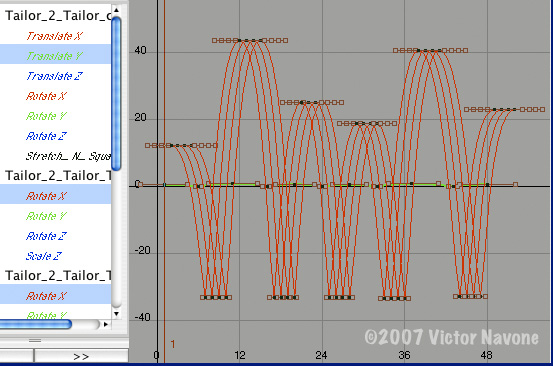
Easy Overlap - Adding overlapping action to things like tails, hair and even the spine can be tedious, but it's necessary to show weight. Here's a quick way to take the keys from one spline and apply them to others to get a simple version of successive-breaking-of-joints. In this case I will take the bouncing animation of a ball and apply it to his tail for overlap. The first spline is the Translate Y of the character Taylor (graciously provided by AnimationMentor.com).
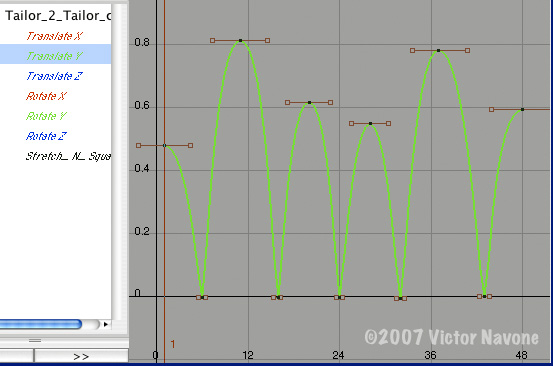
By copying these keys into the joints of the tail and offsetting them in time I can create some quick and dirty overlap. In this example I've offset the keys for each joint by one frame so that each joint reaches it's extreme rotation at a different time, and the rotation progresses like a wave down the chain of the tail. The amount to offset the keys in time for each joint will depend on the speed of the animation. Start with an offset of 1 frame per joint and increase as needed. I've also had to scale the values of the keys to the appropriate range; the Y Translate went from 0 to .8 units, so I used the scale and transform tools to make the X Rotation splines range from -30 to 45. Here is what the adjusted splines look like:
Of course it's not perfect, and it will require more custom keys at the beginning and ending of the action, but this is a good start.
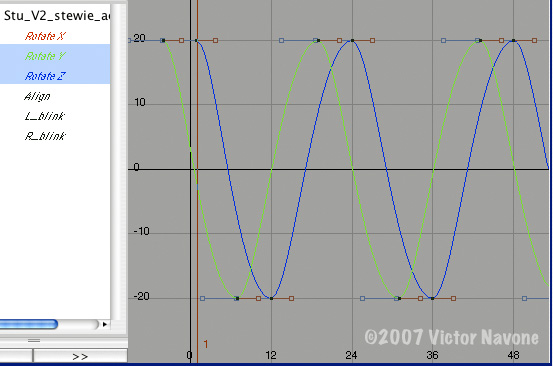
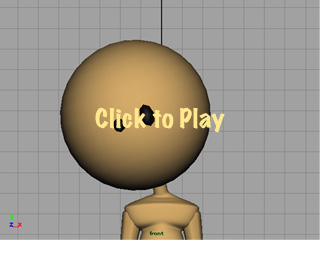
In the above example I only duplicated the keys to rotations on the same axis. By copy-paste-offsetting keys from one rotational axis to another axis on the same joint you can add overlap and interest to a simple move. In the following example I will take the side-to-side (Z) rotation of the character's head and copy it to the turn (Y) rotation. First here's the head with just the Z rotation:
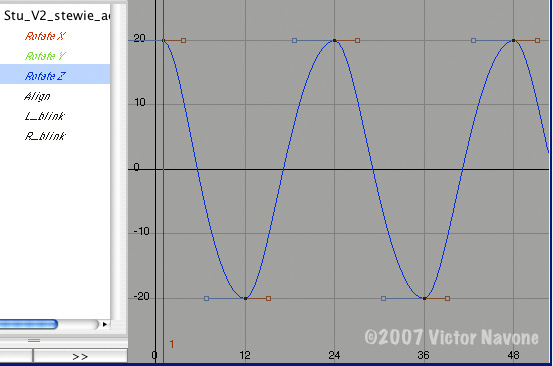
Now I'll copy those keys to the Y Rotation spline. Depending on whether you move the Y Rotation keys ahead or back in time you will get a different result. In this case I moved the Y Rotation keys 5 frames earlier to make the turning of the head lag behind the tilt, creating a nice Stevie Wonder effect!